A forum user had this complaint about Office 2013:
To open an existing document from a program like Excel, I have to follow these steps:
1. Click 'Open' from the Quick Access toolbar or by clicking on 'File'
2. Click on 'Computer'
3. Click on 'Browse'
4. Select the file I want to open.This is 4 steps! Previously, clicking on 'Open' would skip the middle two steps.
Yes, Office 2013 adds too many steps to open files. But you can cut at least one step when you open a file – clicking the Browse button. You can use a macro to open the Open Explorer dialog directly.
Open File, Options, Save. In Default file location, enter your most frequently used file path. (You'll need to set the file path in each Office application.)

Double click on Computer to open the file explorer to that folder. (The Browse button uses this path too.)
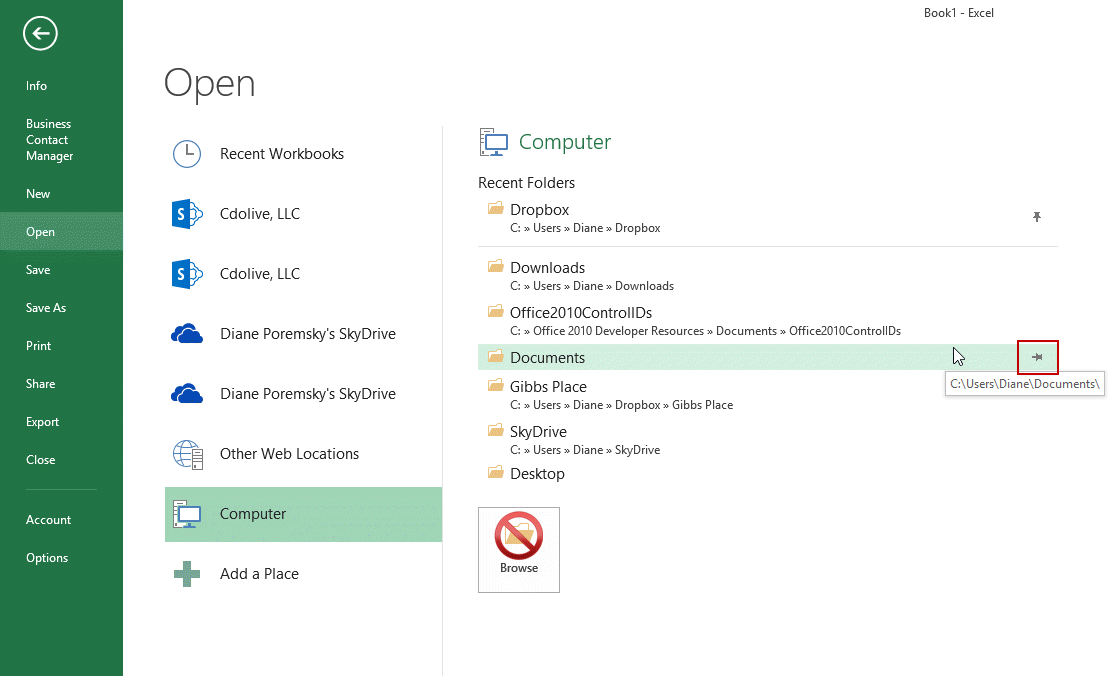
A recently used folder list displayed on the right when you click Computer. Pin the most used folders to the top of the list so you don't need to browse for these folders in the Explorer window. To use, click on folders in the list to open the File Explorer.
If you always want to bring up the Open or Save explorer window, select Don't show the Backstage when opening or saving files. This option will bring up the Open or Save explorer.
Use a simple macro
Still too many clicks and you want to keep the Backstage available at least some of the time?
You can use a macro to open the Open dialog directly. Add it to the QAT or ribbon for easy access. Like double clicking on Computer or clicking Browse, this macro opens the file explorer to the path set in File, Options, Save.
Excel's Open Explorer dialog:
 Sub ShowOpenDialog()
   Application.Dialogs(xlDialogOpen).Show
End Sub
Word's Open explorer:
Sub ShowOpenDialog()
    Dialogs(wdDialogFileOpen).Show
End Sub
How to use macros
First: You will need macro security set to low during testing.
To check your macro security, go to File, Options, Trust Center and open Trust Center Settings, and change the Macro Settings.
After you test the macro and see that it works, you can either leave macro security set to low or sign the macro.
Open the VBA Editor by pressing Alt+F11 on your keyboard.
Excel: If you have a personal workbook (Personal.xlsb), paste it into a module. (Right-click, choose Insert > Module to insert a new module, if necessary.) If you need to create a personal workbook, record a macro, choosing "Personal Macro Workbook" from the Store Macro in list. Click Stop Recording after clicking Ok.
Word: Right-click on Normal, choose Insert > Module to insert a new module.
Copy and paste the macro into new module.
More information as well as screenshots are at How to use the VBA Editor
And if anyone is using MS Project there's a fourth macro!
Sub ShowOpenDialog()
Application.FileOpenEx
End Sub
And the macro for PowerPoint is:
sub ShowOpenDialog()
Application.FileDialog(msoFileDialogOpen).Show
End Sub
And the reason MS uses three different syntaxes to do the same thing is? Answers on a postcard please 🙂
it would need to be really tiny print to fit on a post card. 🙂 Actually, some of it falls back to the product teams - when some of this stuff was written, they more or less worked alone and didn't collaborate as much as they do now.
Very helpful. Thank you. That's MUCH better.
"Don't show the backstage" - thank you so much for posting that. This has been annoying the crap out of me for MONTHS and who the heck would know that Microsoft calls all their stupid extra steps "the backstage"?
I think they named it because it's the support behind the features - not unlike the backstage crew at other events. But yeah, it's dumb.
I would so love to have the name of the Microsoft person responsible for this completely stupid change so I could inquire of them "what the h... were you thinking?!"
... That's not what I would do to them !!!